AGIT DOGS. AGIT COGS. AGITATOR CATCH GEARS. Whatever- they are necessary components for the successful “CA-CHUNK” cycle in your washing machine.
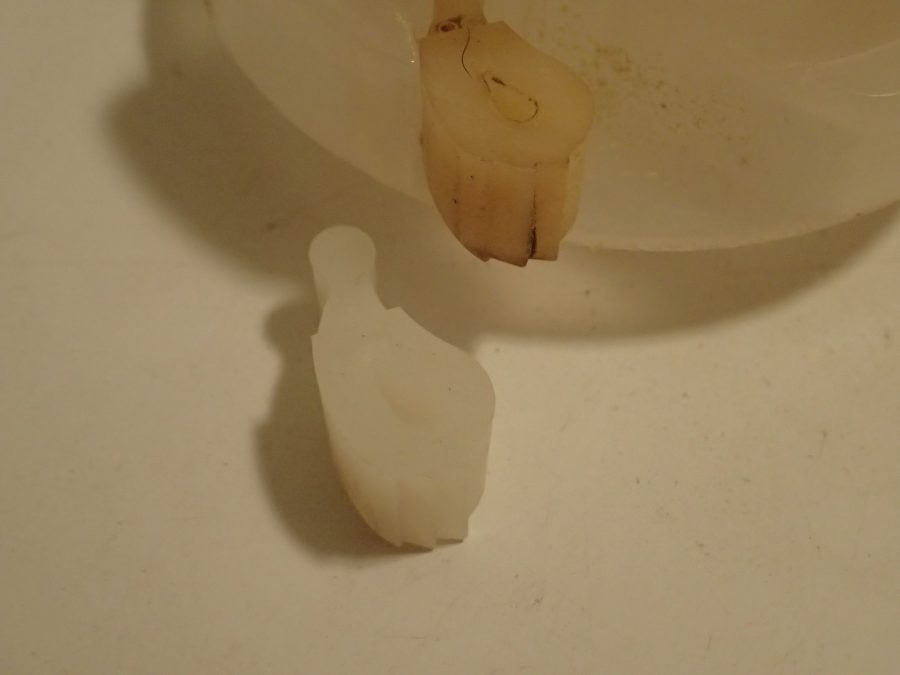
COGS? DOGS? (Recall the Sewing Senior LAME? Bottom “feed dog?” of the sewing machine?)
Well in this case, they are little plastic tear-drop looking pieces that allow the top portion of the agitator to move freely in one direction while locking it up (top portion of agitator) and preventing it from moving in the other direction. This process creates the “CA-CHUNK” portion of the “CA-CHUNK CHA CHA CHA” process (only my interpretation of the traditional noise produced in my type of a properly functioning washing machine).
I noticed last week that although there was still “washing machine noises” indicating some agitation was occurring, something wasn’t right. After a couple of experiments with carefully placed clothing in the tub and repeatedly opening and closing the door to see the reaction of the material in the water, (did not want to “dig into the machine” to override the safety switch which stops the motor every time the door is opened) I tried turning the agitator by hand and noticed the traditional “locking in one direction” no longer worked. Big clue. The top portion of the agitator was free spinning in both directions. (The bottom agitator portion was working fine, but alas, no “CA-CHUNK” with my CHA CHA CHA CHAS! lol)
I WANT MY “CA-CHUNK” BACK!
Almost as simple as make, model and serial number. Enter those on the manufacturer’s webpage then read various descriptions of common agitator problems, select the situation most fitting, watch a couple of repair videos, order repair parts and then wait for their delivery. This is the hardest part for me…..the waiting for new parts. Once again I found it quite helpful to reassemble the agitator with the old parts for two reasons: 1) Needed parts for the ultimate repair don’t get misplaced or lost, and 2) by reassembling the equipment soon after disassembly (with the old parts when possible) I become more familiar with the unit and how it operates so the eventual “repair” goes much easier.
Here are some photos of the repair project:
BELOW: Agitator in center of washing tub
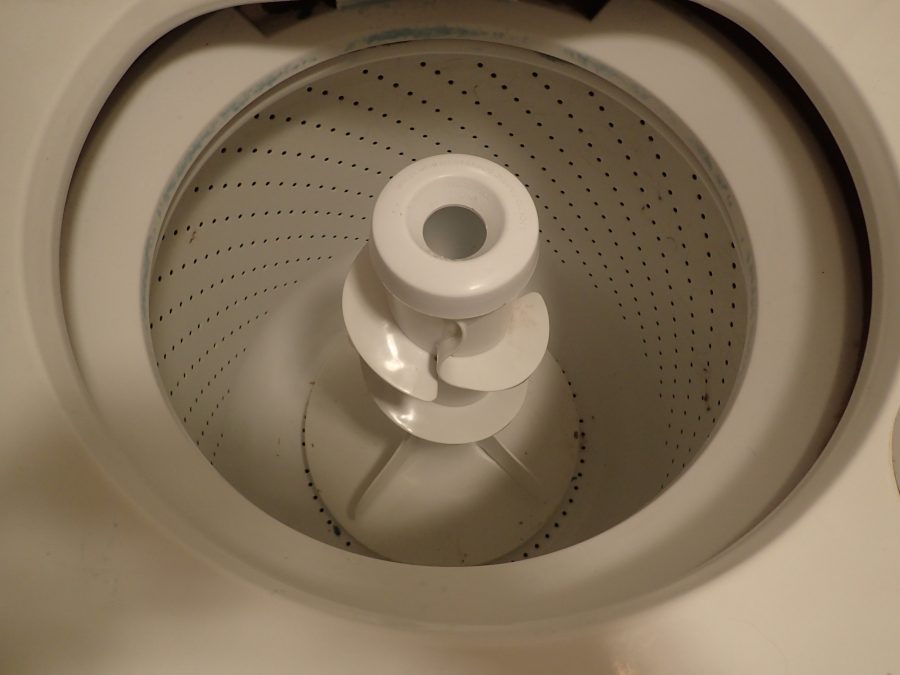
BELOW: Removing liquid softener container (Note: Parts were often difficult to separate due to years of trapped and accumulating lint and soap film/scum. Yes rather gross but I kept telling myself…..heck, it’s probably clean gross stuff anyway. lol)
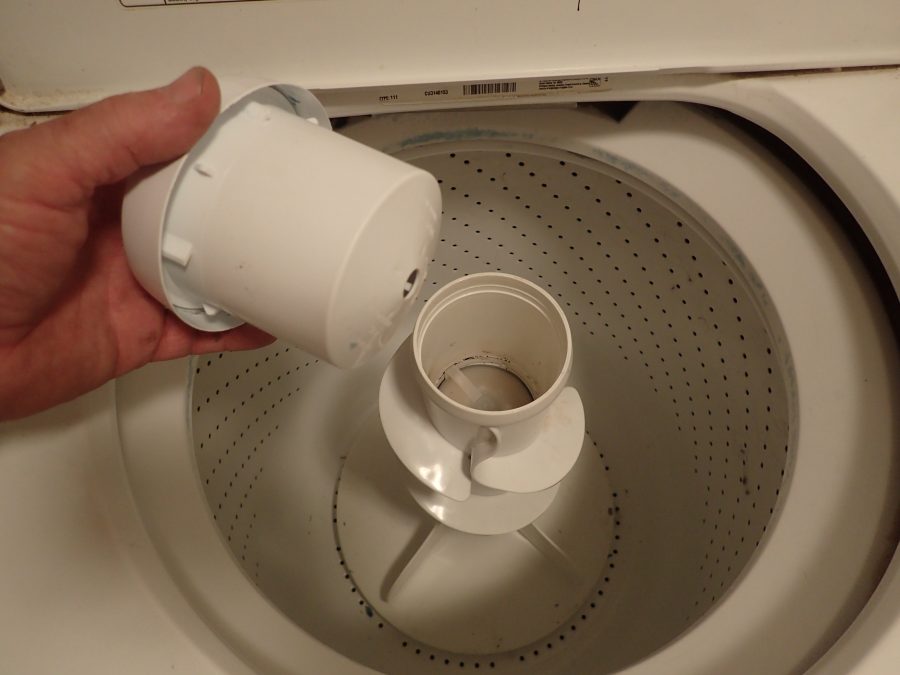
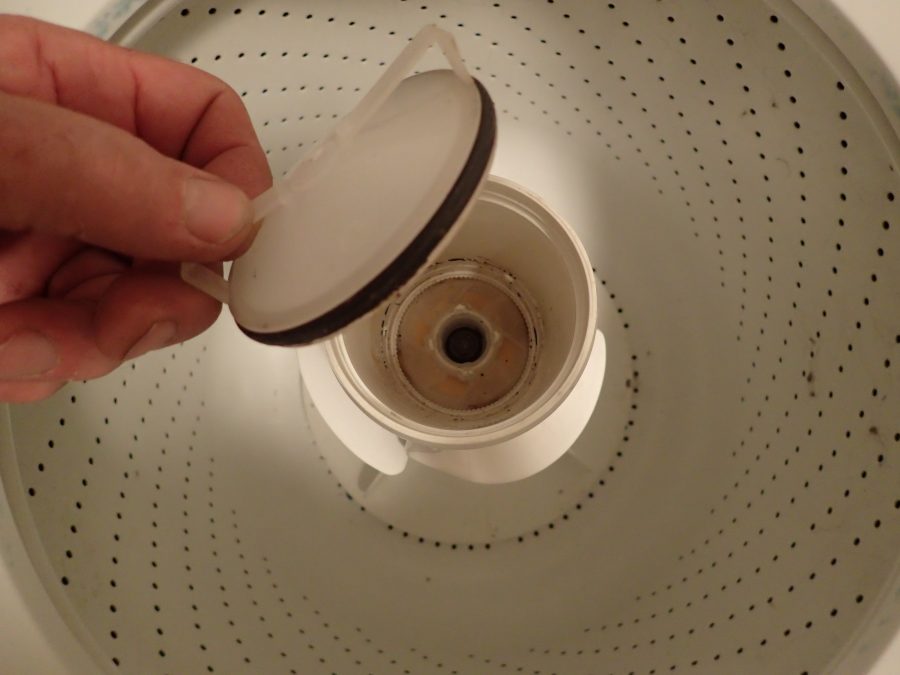
BELOW: Cap with black rubber o-ring seal that prevents water from seeping down to motor spindle. (In this model the cap is removed by pulling on the two finger bands (10 o’clock position to 4 o’clock position running through the center of the seal cap. Pull it out just like a tub drain plug. REM these parts were pretty gross at first – might have to wiggle it around to get it out of the agitator housing.)
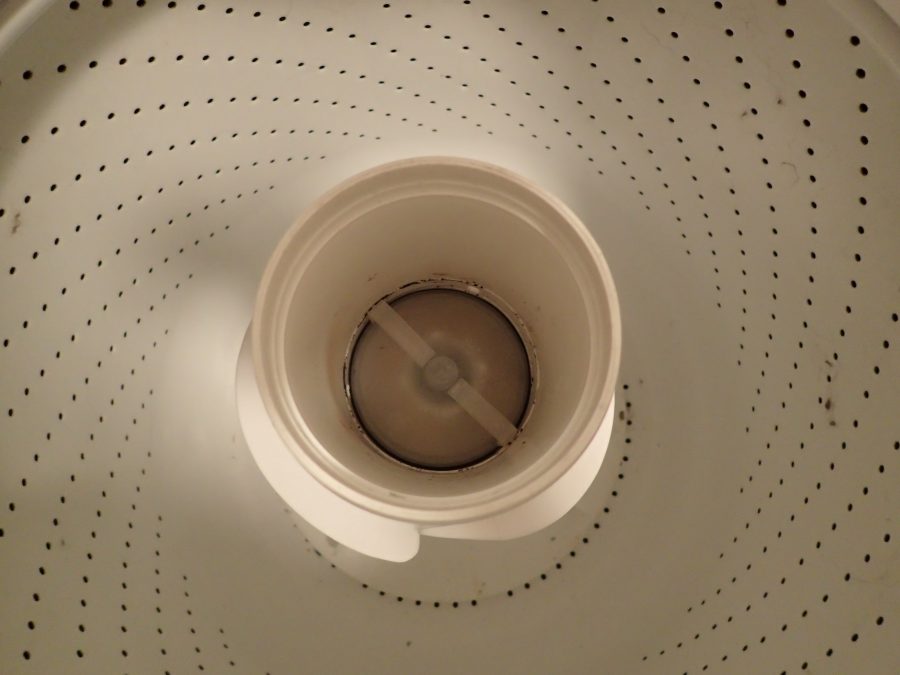
BELOW: Cap and seal removed exposing bolt holding agitator to spindle.
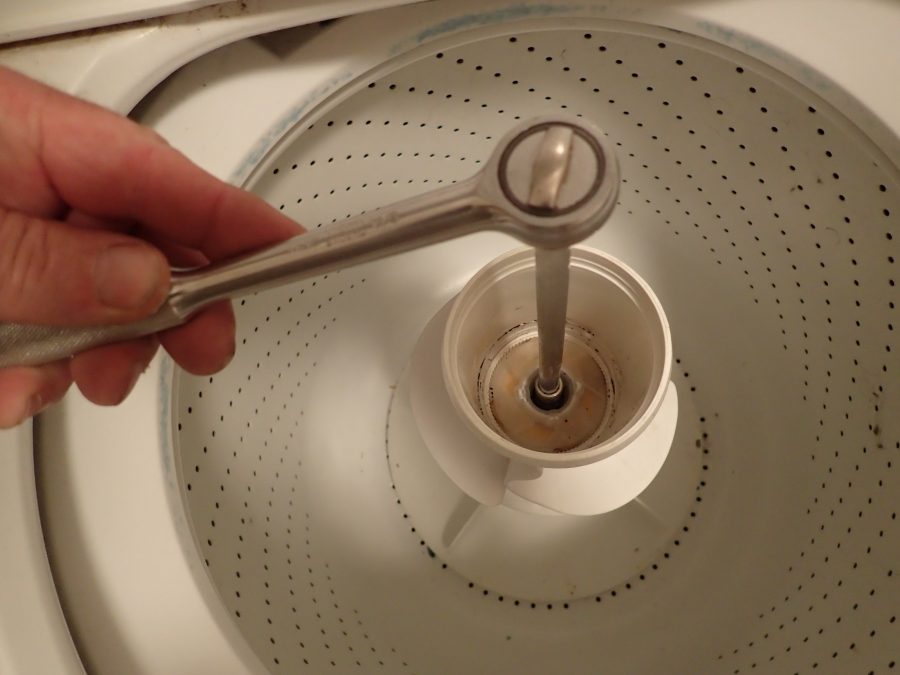
BELOW: Removing 7/16″ bolt.
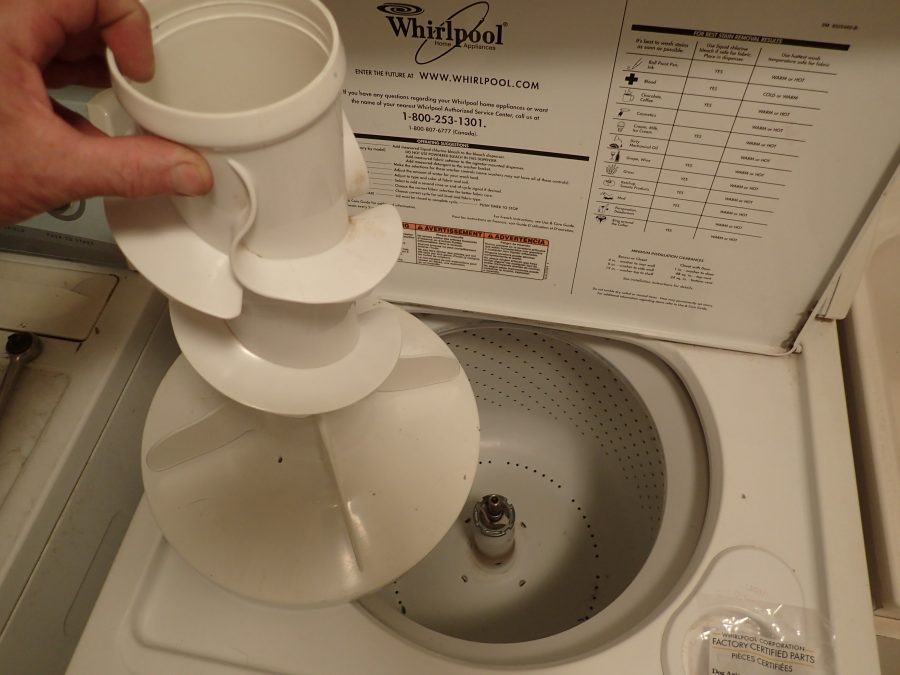
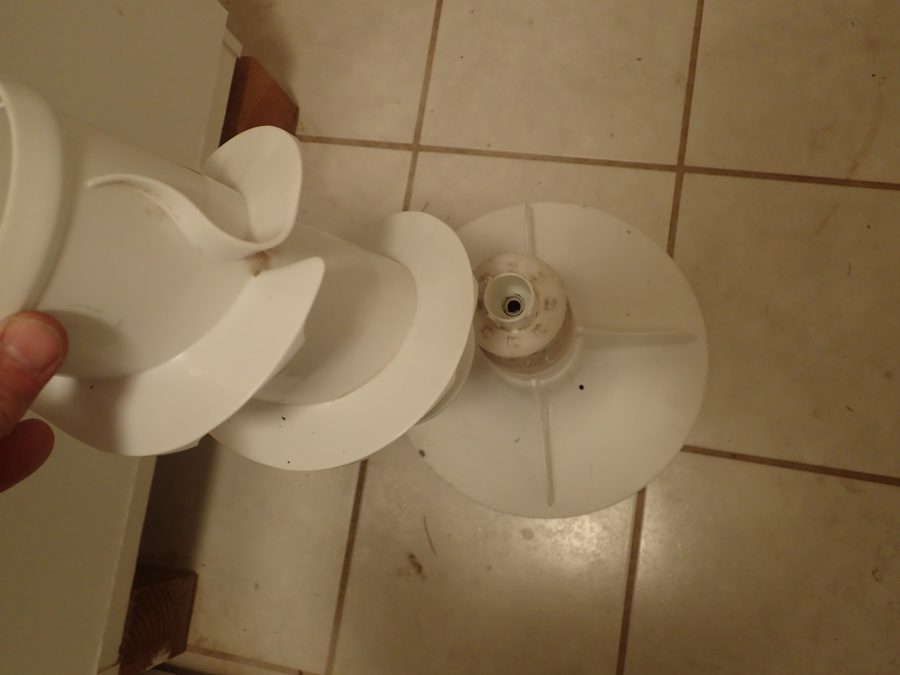
BELOW: Remove entire agitator unit (there are two pieces, upper (with the spiraling vanes, and the bottom with the four vertical vanes) that will be later separated.
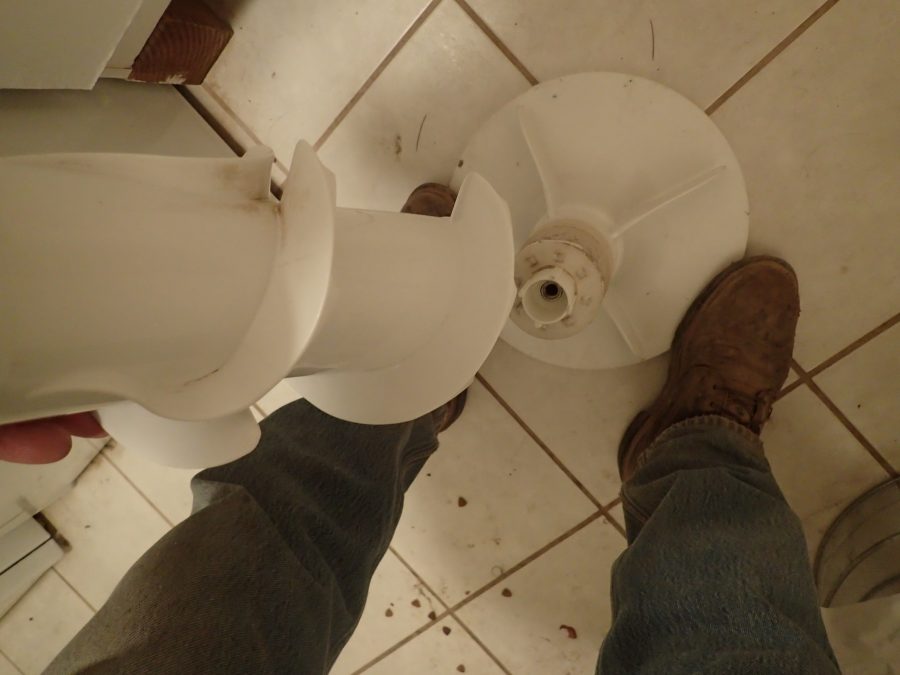
BELOW: Gently hold the bottom portion on the floor with your feet and lift the upper portion of the agitator off the bottom part (once again, these parts will be held together with years of lint, soap film, etc., so a little wiggling while lifting will probably be necessary to separate the two pieces)
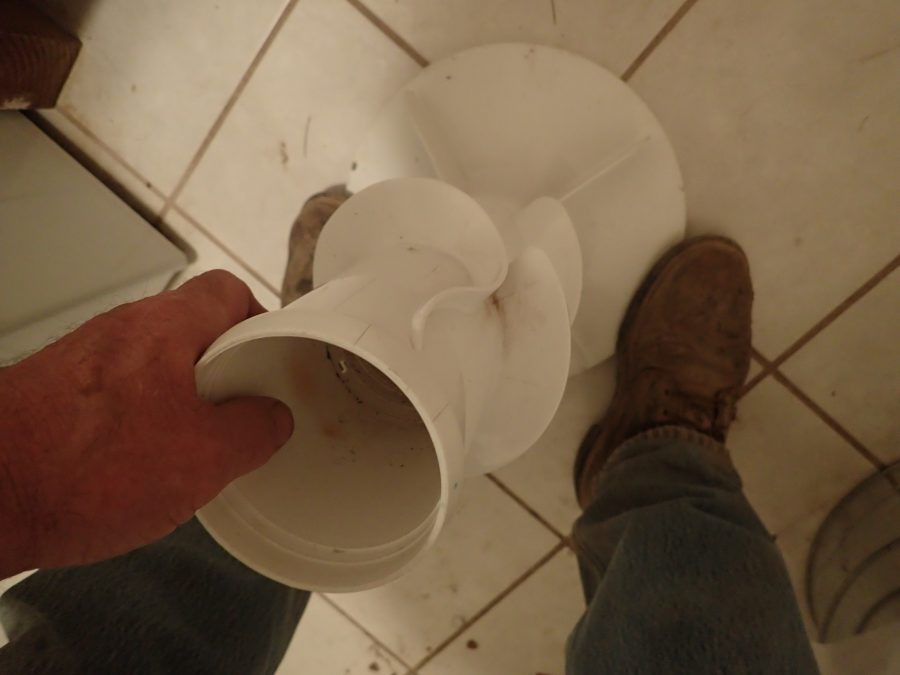
BELOW: There we go! Upper and lower agitator pieces separated. We will be concerned with the upper portion so you can place the bottom part somewhere else so you don’t accidentally step on it and break and/or slip on the sucker resulting in some other personal injury. (The DIY setting of broken bones is not recommended or covered in this post. lol)
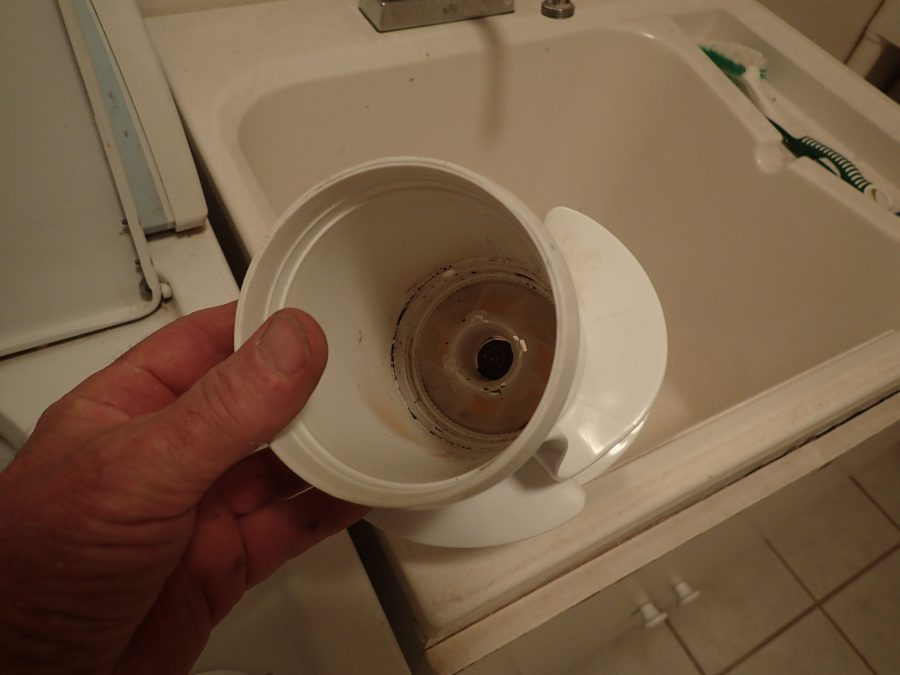
BELOW: Inside the upper part you will see a circular plastic piece that fits into the agitator housing like a doughnut in a coffee can. IMPORTANT NOTE: this plastic container retains the four AGIT DOGS held in place (upside down) by a large yellow plastic washer like piece. BEFORE DISMANTLING THESE PARTS make sure the sink drain is covered or anything else where small parts might get dropped and lost. Top of the closed door washer with a towel over it is perfect as the towel will help prevent pieces from bouncing off the lid and ending up behind the machine – or worse – down an open drain!
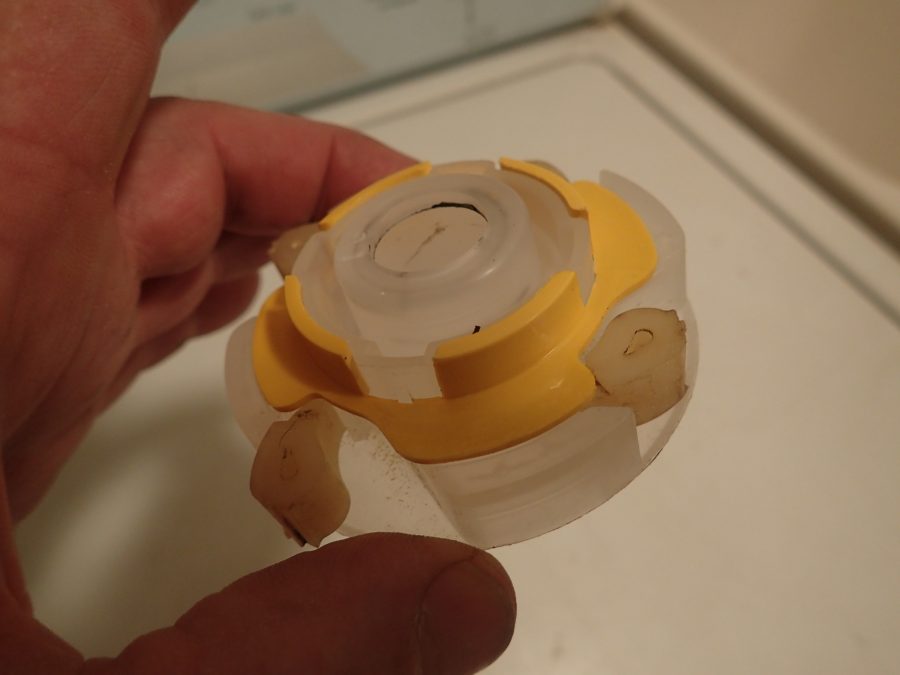
BELOW: So if the geared cogs are also called “dogs”, couldn’t this unit be called the “DOG HOUSE”? lol The yellow washer like piece just slips over the middle column and the rounded yellow lobes hold the dogs in their individual rounded compartments. (next photo)
BELOW: With the yellow “washer-like cap retainer” removed you can see where the small end of the tear drop replacement cogs/dogs drop into their individual compartment. You can also see by the design of the housing these cogs can wiggle in place because they are “hinged” in the rounded compartment, if the other end wiggles outside the container, the gears on the cogs catch the plastic gears within the agitator causing it to abruptly stop (start?). CA-CHUNK! More on that later. PLEASE REALIZE – when reassembling: the geared portions of the “tear drop cogs” must be completely inside the outer rim of the holder, or the cogs will be pushed out of alignment by the circular gear teeth inside the agitator. (upon which they catch when working properly) IN OTHER WORDS – REMEMBER the doughnut example? Well, inside the coffee can (agitator) there is a ring of small plastic gears that the above “DOG HOUSE – DOUGHNUT” must slip inside.
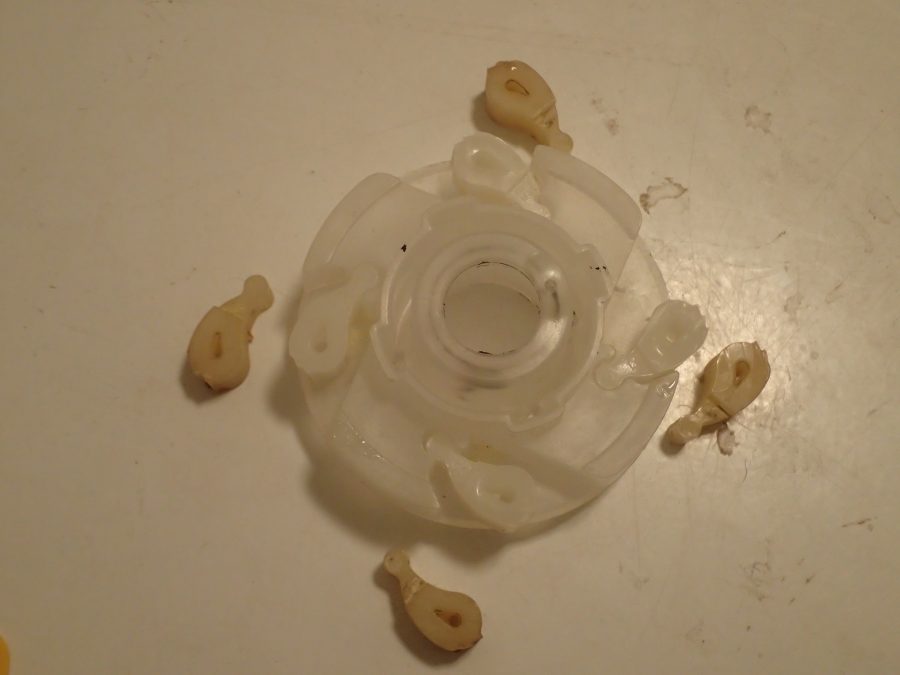
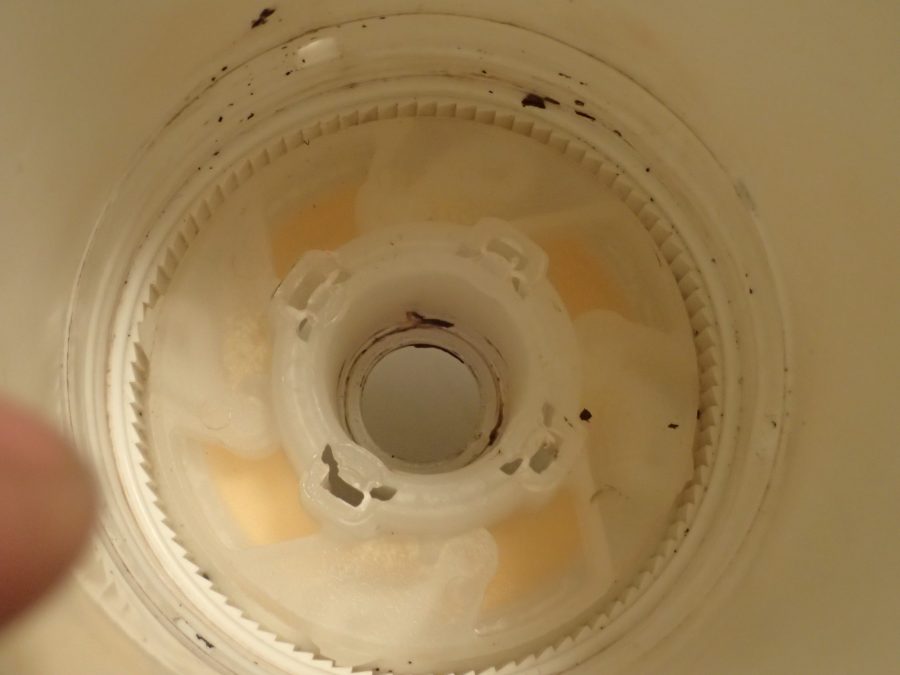
(BELOW) Maybe this will help explain
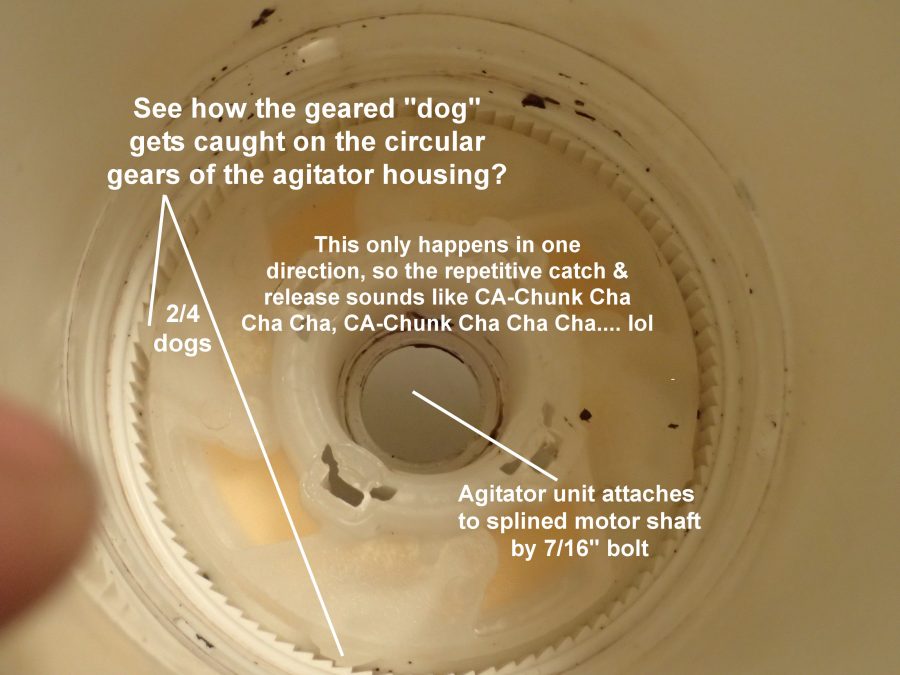
So basically, the bottom agitator is going one way, but the top portion repeatedly suddenly stops (due to the cogs catching the agitator housing) but as the gear grip releases due to sudden lack of motion (or is it the opposite? that the dogs suddenly engage and are pushed to release? don’t know, don’t care right now. lol), the cycle only begins again due to the continuing motion of the bottom agitator – yup, you got it…. CA-Chunk Cha Cha Cha, CA-Chunk Cha Cha Cha …
BELOW: OK, here’s another tricky part, lining up and reassembling without knocking the DOGS in the DOGHOUSE out of position!
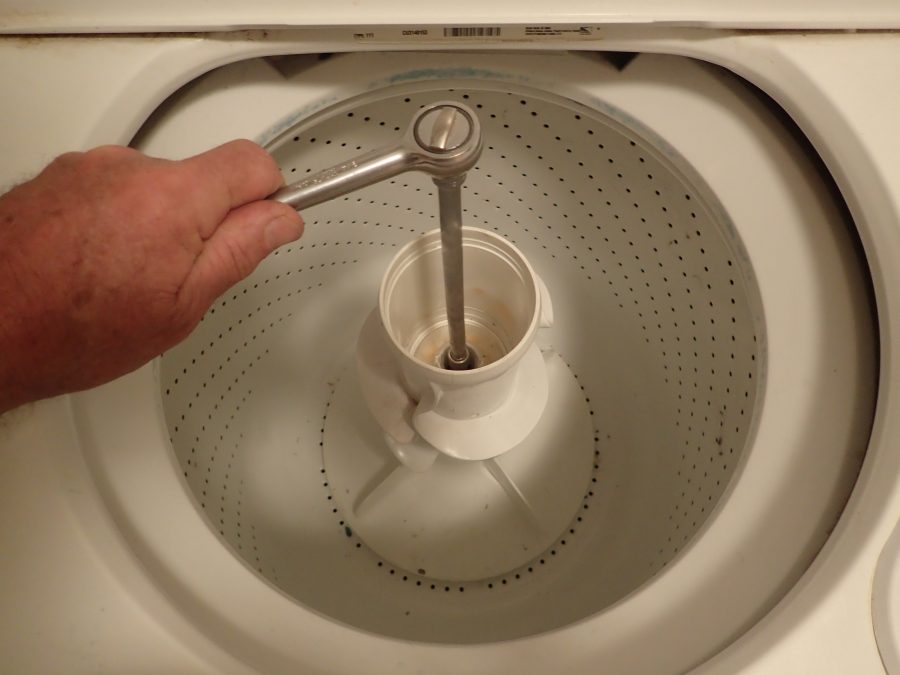
BELOW: Install agitator unit with the 7/16″ bolt
BELOW: Replace the cap and seal and the liquid softener dispenser,.
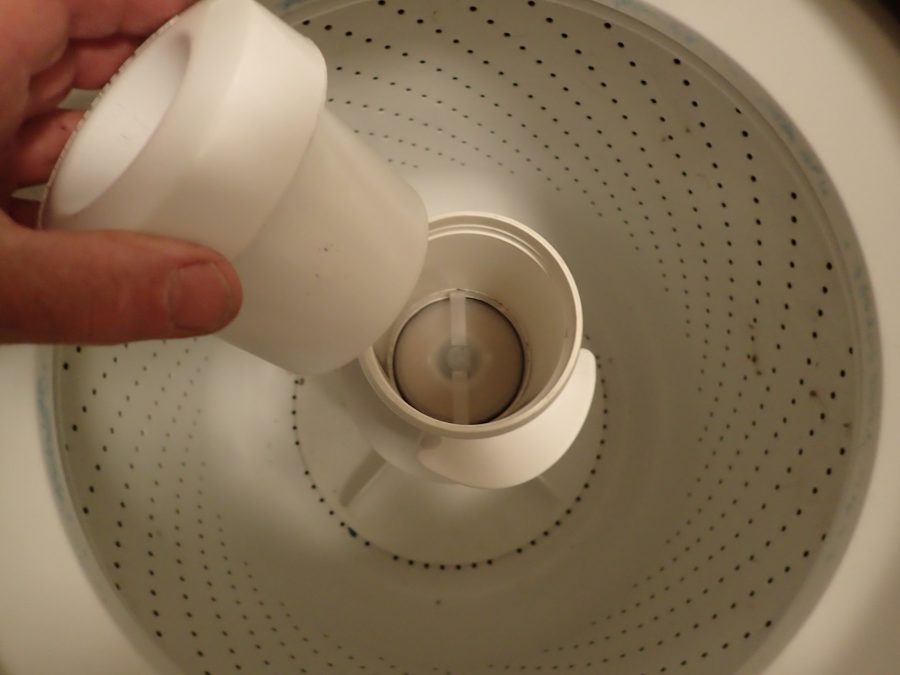
BELOW: Well, at least it looks nice and clean now….but what about…….
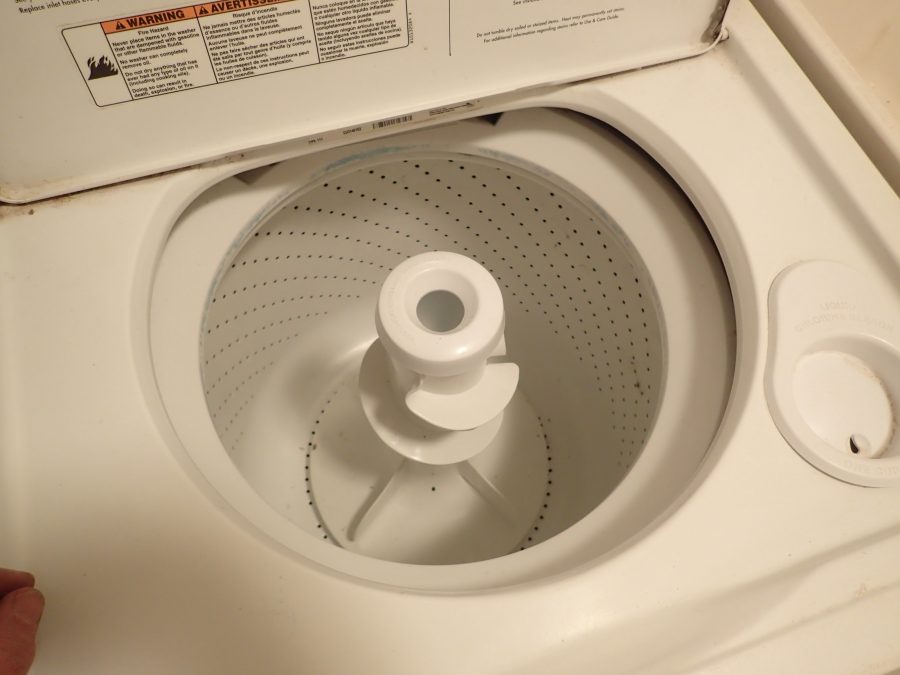
COULD I HAVE A DRUM ROLL PLEASE?……..


